BoxmoeUPimg使用文档
这是BOxmoeUPimg图床主题的使用文档,主题的下载下单则在盒子萌
#主题安装
1.下载主题ZIP压缩包后,可像其他主题一样上传安装,或者解压后上传到主题目录;
2.启用主题后,先在仪表盘中的BOXMOE主题设置菜单进行主题设置后保存
#主题授权
1.购买主题完成后在订单中点击 创建授权;
2.等待完成创建后查看邮件授权信息;
3.登录授权中心后,点击添加域名授权,填入域名,
注意一级域名即可(domain.com √) 错误示例: (xxx.domain.com ×)
#导航设置
1.导航菜单为双导航,具体设置可以查看视频;
2.导航菜单的图片使用了fontawesome;
3.图片选择在https://fontawesome.com.cn/v4/icons
HTML
<i class="fa fa-address-book"></i>【boxmoeupimg图床导航菜单设置】 https://www.bilibili.com/video/BV1djCrYsE6T/?share_source=copy_web&vd_source=14a9b2eeea3077c6977e9fd5ea103b29
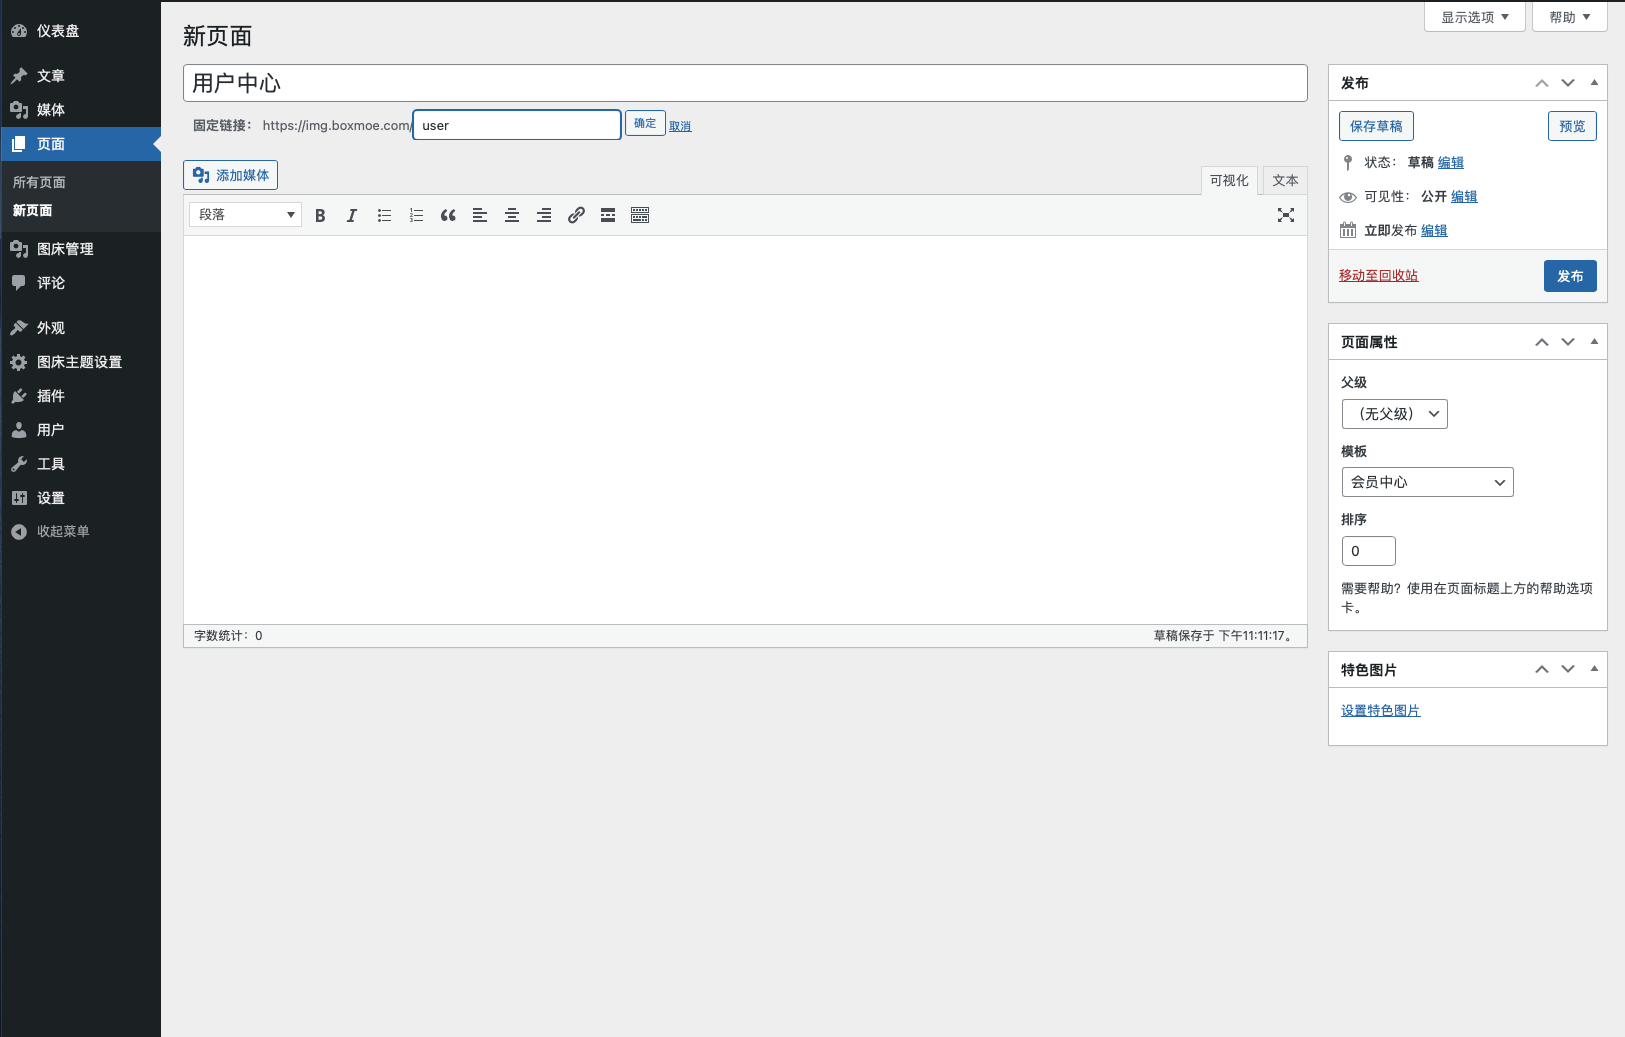
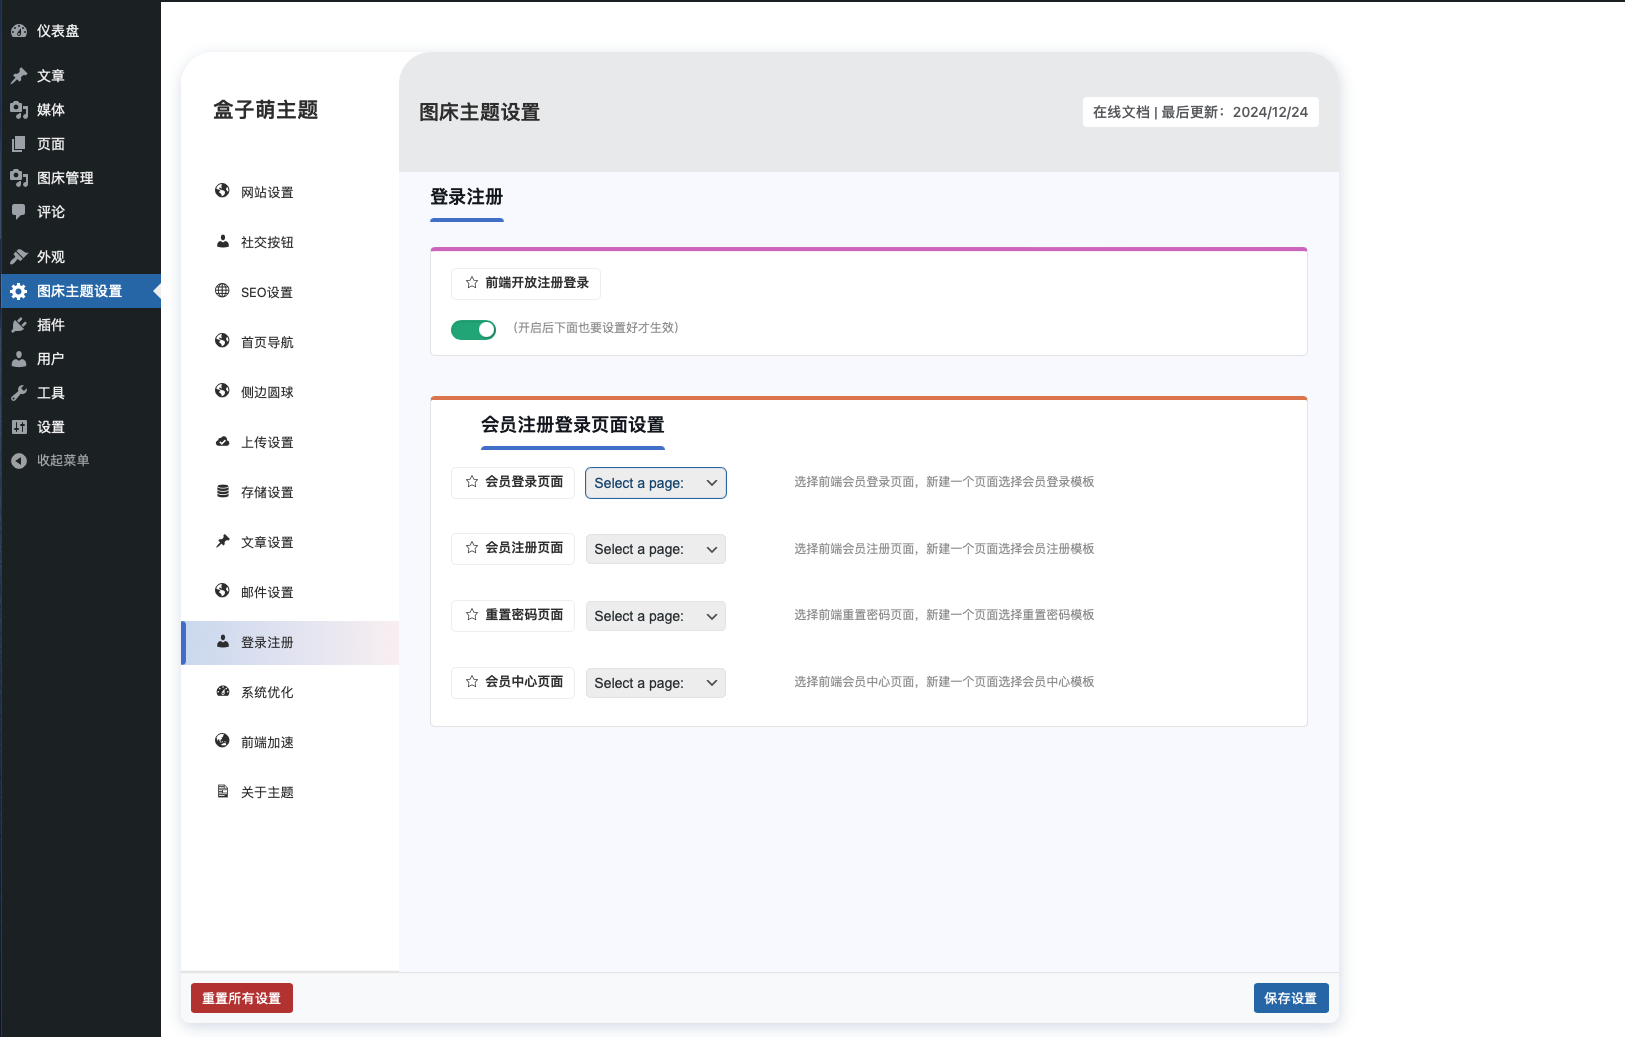
#页面创建
1.页面包括了,访客图片、注册、登陆、找回密码、会员中心页面;
2.直接在页面-新页面 创建后选择模板即可;
3.创建完成后,在主题设置的【登陆注册】中,选择相应页面保持即可
【盒子萌WordPress图床主题设置-导航-页面创建(1)】 https://www.bilibili.com/video/BV19fkHYcE8Q/?share_source=copy_web&vd_source=14a9b2eeea3077c6977e9fd5ea103b29
#2.0版本更新新增字段,需要SQL数据库执行命令
SQL
ALTER TABLE wp_bm_upload_info
ADD COLUMN upload_web VARCHAR(100) NOT NULL DEFAULT ” COMMENT ‘上传来源’,
ADD COLUMN upload_origin VARCHAR(255) NOT NULL DEFAULT ” COMMENT ‘请求来源网站’;#其他
对于新用户来讲可能存在的就是上面的设置方式,其他的都是接入了wordpress的原始功能
#用户API接口示例
PHP
<!DOCTYPE html>
<html lang="en"></p>
<p>  <head>
    <meta charset="UTF-8">
    <meta name="viewport" content="width=device-width, initial-scale=1.0">
    <title>图片上传</title></p>
<style>body { font-family: Arial, sans-serif; margin: 50px; } #file-input { margin-bottom: 20px; } #upload-status { margin-top: 20px; font-weight: bold; } #image-preview { margin-top: 20px; } #image-preview img { max-width: 100%; height: auto; border: 1px solid #ddd; padding: 10px; margin-top: 10px; }</style>
<p></head></p>
<p>  <body></p>
<h1>上传图片</h1>
<p>    <input type="file" id="file-input" accept="image/*">
    <button id="upload-button">上传</button></p>
<p id="upload-status">
<div id="image-preview"></div>
<p>    <script>document.getElementById('upload-button').addEventListener('click',
      function() {
        const fileInput = document.getElementById('file-input');
        const file = fileInput.files[0];</p>
<p>        if (!file) {
          document.getElementById('upload-status').textContent = '请先选择一张图片!';
          return;
        }</p>
<p>        const formData = new FormData();
        formData.append('file', file);</p>
<p>        const url = '用户中心申请的API';</p>
<p>        const xhr = new XMLHttpRequest();
        xhr.open('POST', url, true);</p>
<p>        // 设置请求的回调
        xhr.onload = function() {
          if (xhr.status === 200) {
            try {
              // 解析 JSON 响应
              const response = JSON.parse(xhr.responseText);
              console.log(response);</p>
<p>              if (response.code === 200) {
                if (response.url) {
                  const imgUrl = response.url;
                  const code = response.code;
                  const message = response.message;
                  const file_url = response.file_url;
                  const file_path = response.file_path;
                  document.getElementById('image-preview').innerHTML = ` < p > 图片上传成功! < /p></p>
<p>图片返回信息列出</p >
<p > code:$ {
                    code
                  } < /p></p>
<p>message:${message}</p >
<p > url:$ {
                    imgUrl
                  } < /p></p>
<p>file_url:${file_url}</p >
<p > file_path:$ {
                    file_path
                  } < /p></p>
<p><a href="${imgUrl}" target="_blank">点击查看原图</a ></p>
<p>                                    <img src="${imgUrl}" alt="Uploaded Image">
                                `;
                            } else {
                                document.getElementById('upload-status').textContent = '上传成功,但未返回图片 URL。';
                            }
                        } else {
                            document.getElementById('upload-status').textContent = '上传失败: ' + response.message;
                        }
                    } catch (error) {
                        document.getElementById('upload-status').textContent = '解析响应时出错,请重试!';
                        console.error(error);
                    }
                } else {
                    document.getElementById('upload-status').textContent = '图片上传失败,请重试!';
                }
            };</p>
<p>            xhr.onerror = function () {
                document.getElementById('upload-status').textContent = '上传过程中出现错误,请稍后再试。';
            };</p>
<p>            / / 发送请求xhr.send(formData);</p>
<p>                  // 显示上传状态
                  document.getElementById('upload-status').textContent = '正在上传...';
                });</script>
  </body></p>
<p></html>